Adding Multilevel Numbers to Headings in Word
I always find it amusing when the same developer creates two versions of their product with different workflows to configure and customize settings. One such example is the difference within MS Word running on Windows vs macOS. While not enabled by default, it is a trivial task to add multilevel numbering to headings in macOS. In Windows, your mouse/trackpad gets a workout. This blog details a method to enable multilevel numbering for headings in both macOS and Windows.
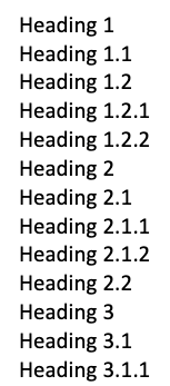
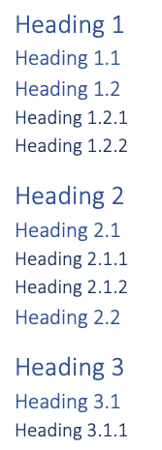
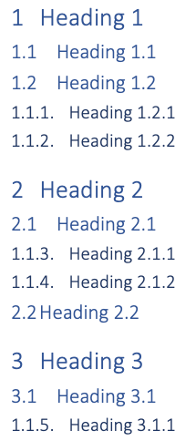
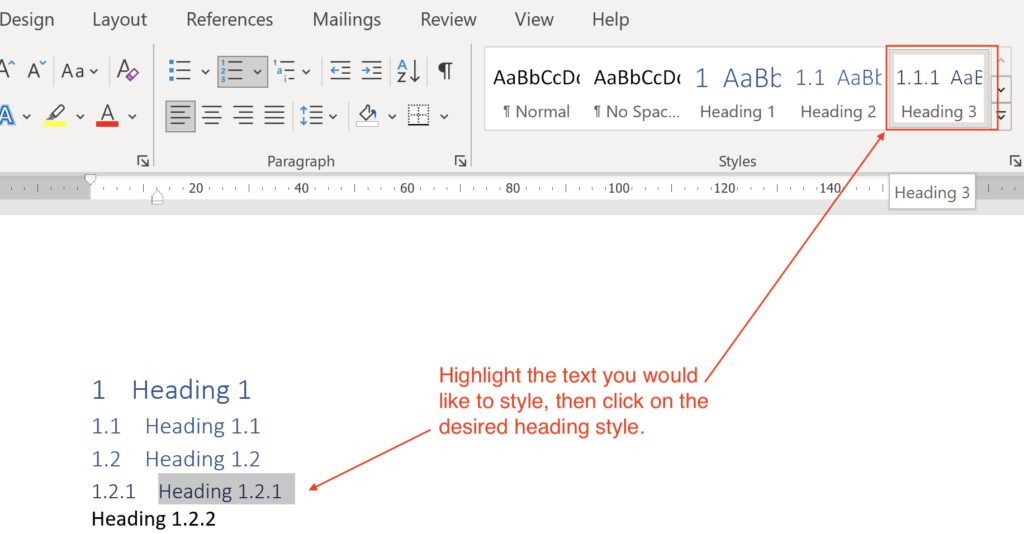
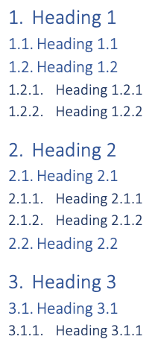
The goal is to transition from numberless headings to numbered headings as shown in the images below. The image on the left shows “normal” text written as a heading to display the style formatting once it is applied. The middle image shows the heading styles applied without numbering. The image on the right shows the heading styles applied with multilevel numbering. The goal is to configure the latter – multilevel heading numbers.
Easy way to add Multilevel Numbering on macOS / Windows
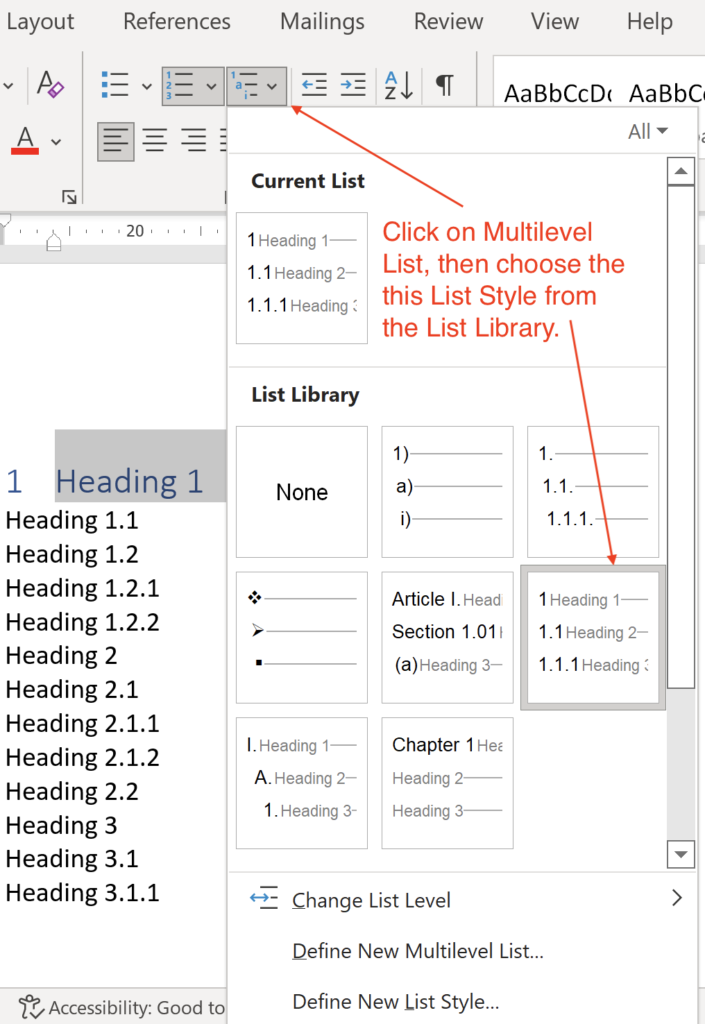
If you want to use the easy button to quickly add multilevel numbering to your headings, click on the ‘Multilevel List’, then choose the multilevel style with numbers and headings as show below:
To apply the style settings, highlight the desired heading text, then click on the desired heading style to apply style settings.
Customizing Multilevel Numbering on macOS
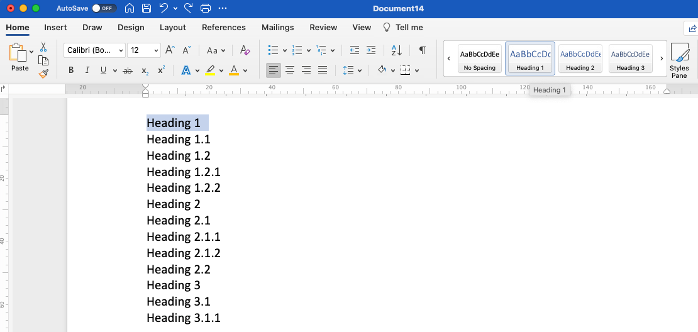
Select the text to which you want to apply the heading style guide. In this case ‘Heading 1’.
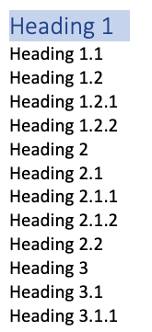
Click on the ‘Heading 1’ in the style pane field to apply the Heading 1 style.
You will see the style applied but there is now multilevel numbering.
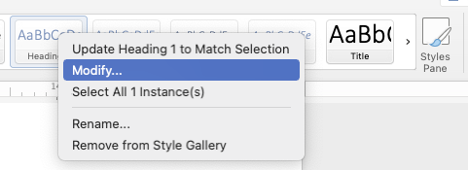
To enable multilevel numbering, right click the ‘Heading 1’ button in the style panel and select ‘Modify’.
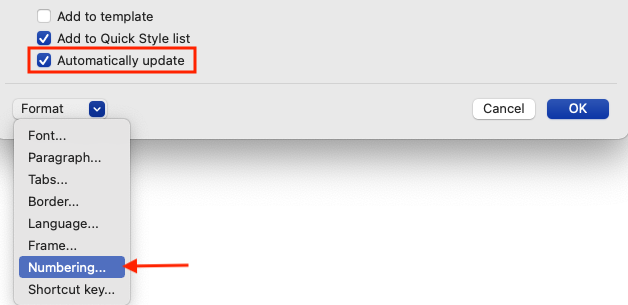
Toward the bottom of the window, check ‘Automatically’ update, then select ‘Numbering’ from the format drop down.
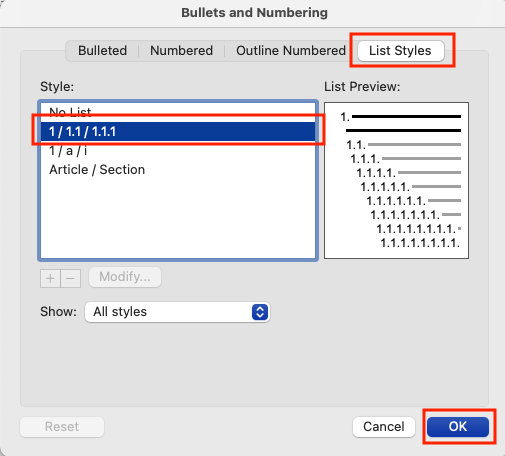
Click on the ‘List Styles’ tab, select the ‘1/1.1/1.1.1’ style option, then click OK twice to exit the wizard.
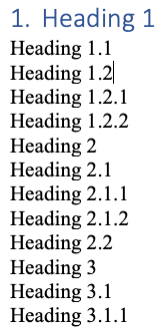
The ‘Heading 1’ formatting should now reflect a level 1 numbering schema as shown below:
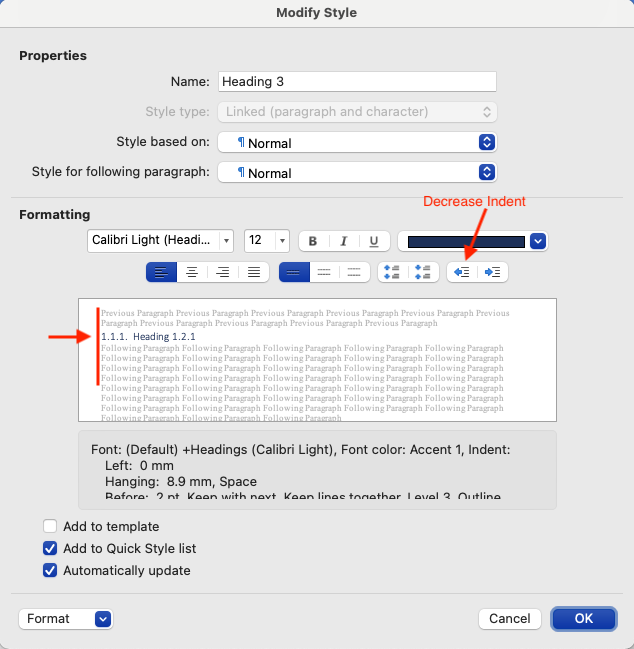
Repeat this process for modifying ‘Heading 2’ and ‘Heading 3’ by right clicking on the respective style buttons and then applying the heading styles to you document. When modifying headings 2 and 3, you may want to click on ‘Decrease Indent’ to align those headings along the left margin, so they are not indented.
The end results should look similar to below:
Multilevel Numbering on Windows
Now let’s show how to achieve the same outcome in the Windows version of MS Word.
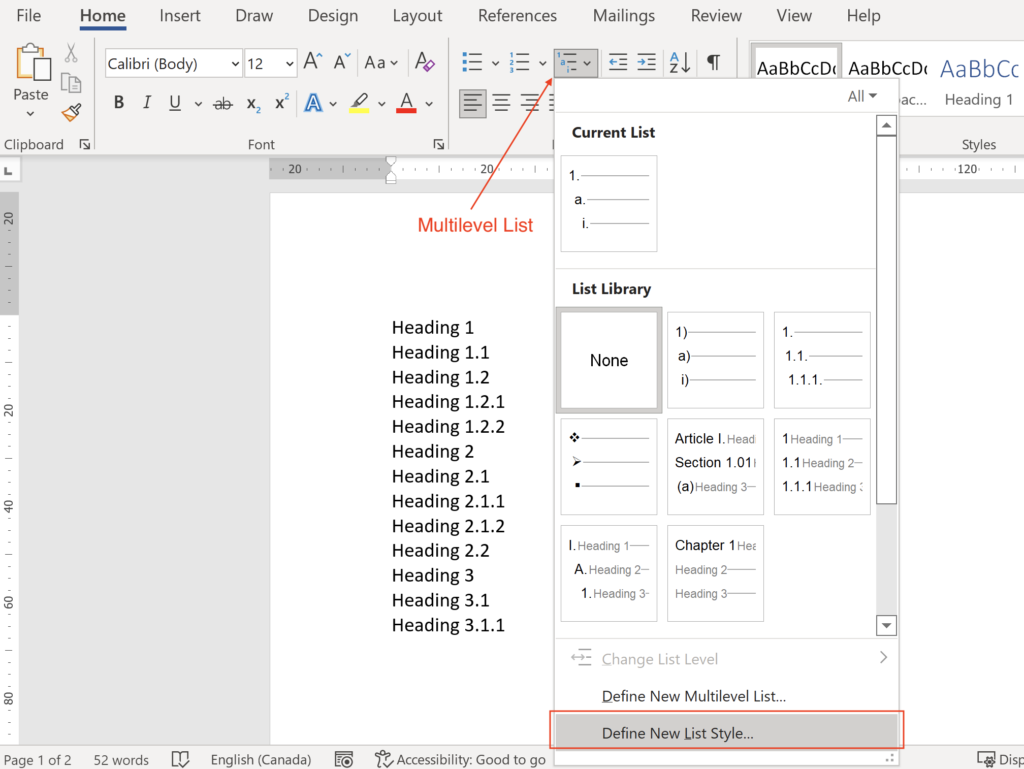
Click the ‘Multilevel List’ button, then select ‘Define New Multilevel List Style’. In the following window click on the ‘More’ button in the lower left corner to expand available options.
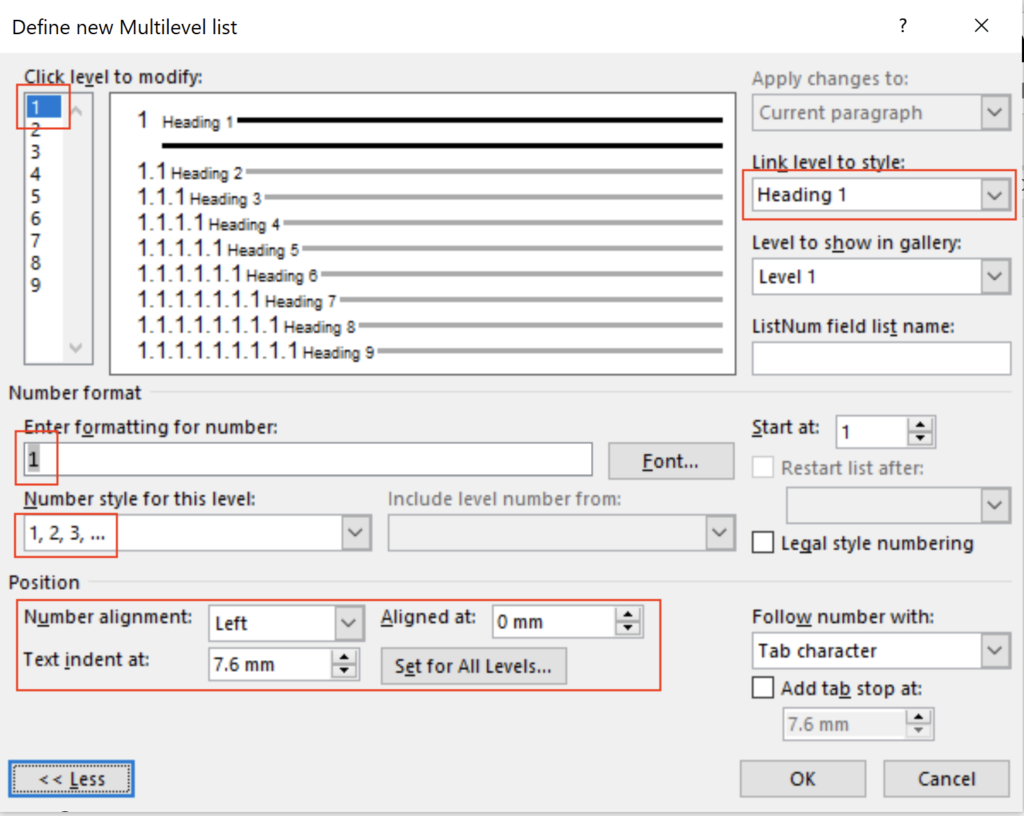
Select the ‘level to modify’ – in this case (1).
Ensure the formatting for Number is highlighted in grey at the correct level.
Adjust the position. Suggested values are:
- Number Alignment: Left
- Aligned at: 0 mm
- Text indent at: 7.6 mm
- Set ‘Link level to style’: Heading 1
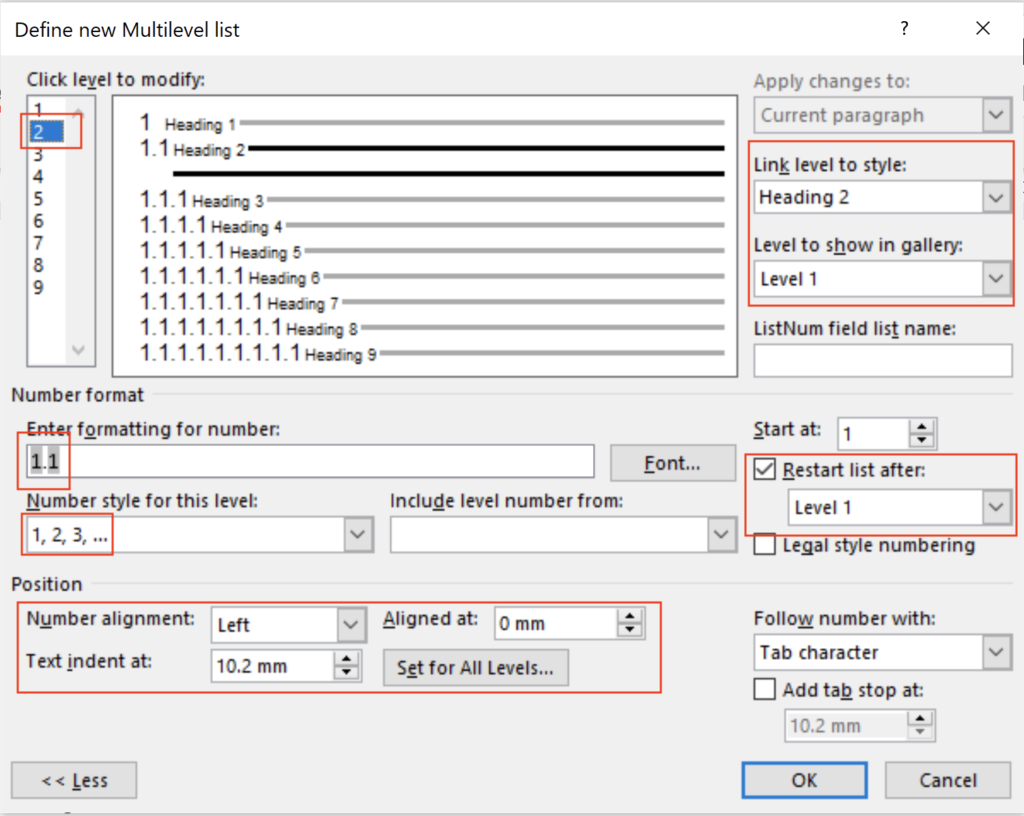
Select the ‘level to modify’ – in this case (2).
Ensure the formatting for heading numbers are highlighted in grey at the correct levels.
Adjust the position. Suggested values are:
- Number Alignment: Left
- Aligned at: 0 mm
- Text indent at: 10.2 mm
Set ‘Link level to style’: Heading 2
Set ‘Level to show in gallery’: Level 1
Check ‘Restart list after’: Level 1
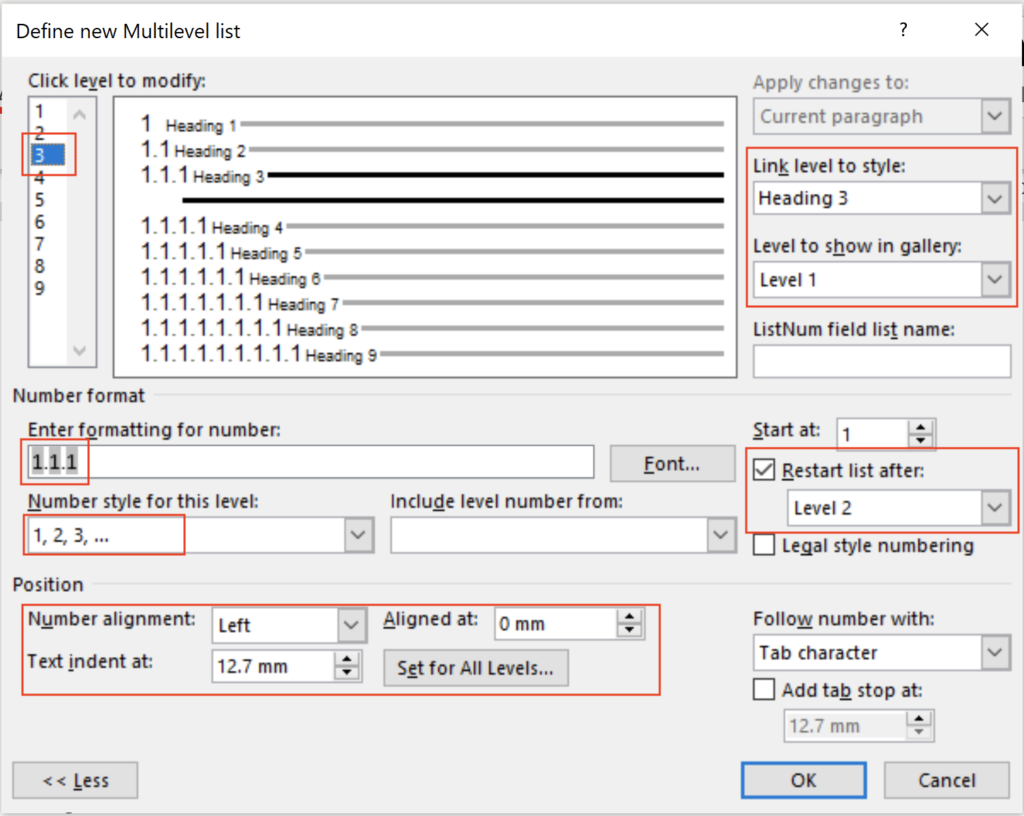
Select the ‘level to modify’ – in this case (2).
Ensure the formatting for heading numbers are highlighted in grey at the correct levels.
Adjust the position. Suggested values are:
- Number Alignment: Left
- Aligned at: 0 mm
- Text indent at: 12.7 mm
Set ‘Link level to style’: Heading 3
Set ‘Level to show in gallery’: Level 1
Check ‘Restart list after’: Level 2
Repeat this process for any remaining levels following the same pattern. A suggestion is to increment the ‘text indent at’ by 2.6 mm for each subsequent level, but this will depend on the selected font settings.
Once the desired levels have all been configured, click on OK to return to the Word document.
To apply the style settings, highlight the desired heading text, then click on the desired heading style to apply style settings.
Slàinte!