A Field Guide to the Canon 5D Mark IV’s Built-in Wi-Fi
Follow these five simple steps to get your Canon 5D Mark IV synced up to Wi-Fi and connected to your smartphone or laptop.
All images via Jourdan Aldredge.
In a hyper-connected world, it may come as no surprise that digital cameras have been quick to adopt Wi-Fi and Bluetooth connectivity for syncing with other devices and smartphones. The Canon 5D Mark IV, like past iterations, is no exception. Let’s take a step-by-step look at how to get your Canon 5D Mark IV synced, connected, and remotely accessed.
Turn on Wifi
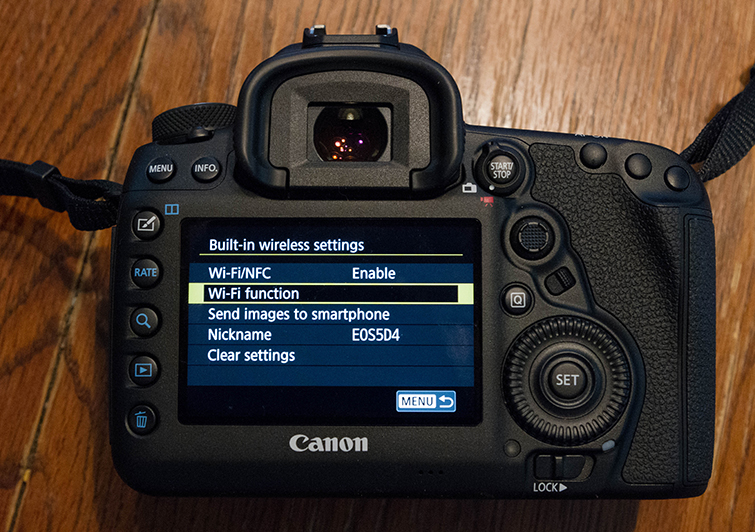
First, you’ll want to turn on your camera’s Wi-Fi, which you can find by navigating through your camera’s menu screen. Scroll through until you get to the settings tab (which is the yellow wrench). From there, you’ll go to the fourth tab, and scroll down to click on “communication settings.” I say scroll, but with the Canon 5D Mark IV, you can use the touchscreen as well to navigate.
From there, click through to the “Built-in wireless settings” and then the “Wi-Fi/NFC” option to enable Wi-Fi (if it already says enabled, and the rest of the options below are available, you’re good to go but may need to clear settings at the bottom in case your camera has already been synced to another device in the past).
You can then create a nickname for your camera. For this example, we’ll just use the default, which is “EOS5D4,” but feel free to make it whatever you’d like.
Download Canon App
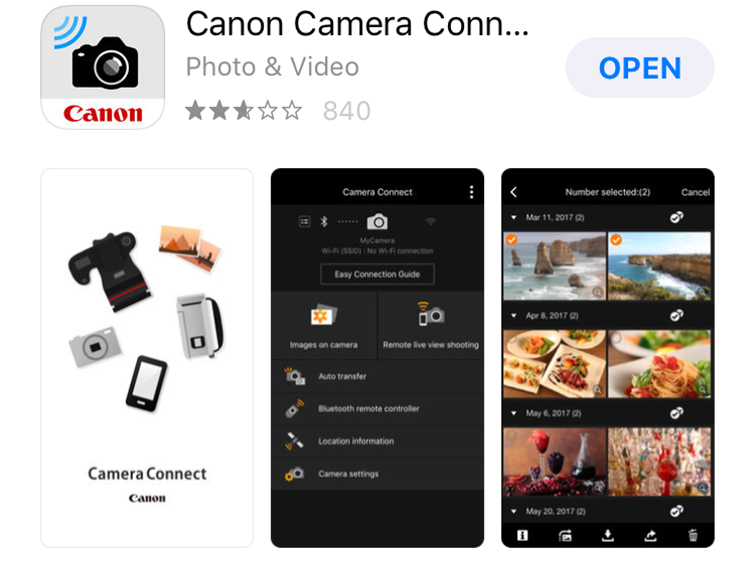
Before we move on to connecting your Canon 5D Mark IV to your smartphone or device of choice, you’ll need to make sure you have the Canon App already downloaded and set up on your device. For this example, we’ll be using an iPhone 6s, but the app should be the same across all smartphones and devices. To download the app, go to your app store to find the “Canon Camera Connect” app. Once the app is downloaded and set up, you can connect your camera using the following steps.
Connect to Smartphone
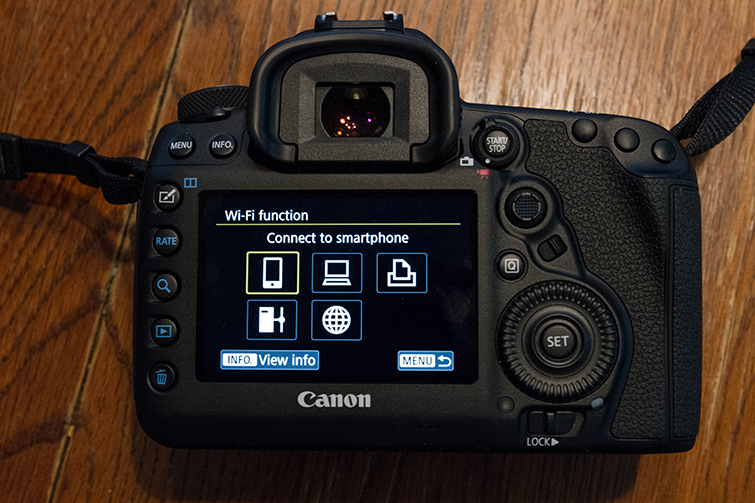
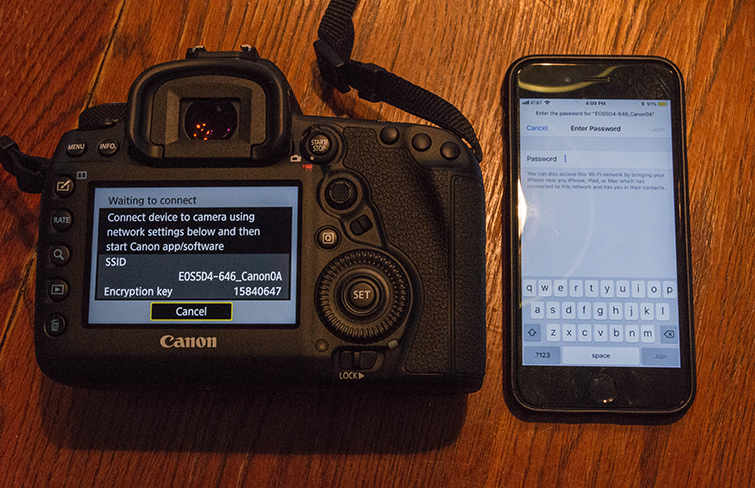
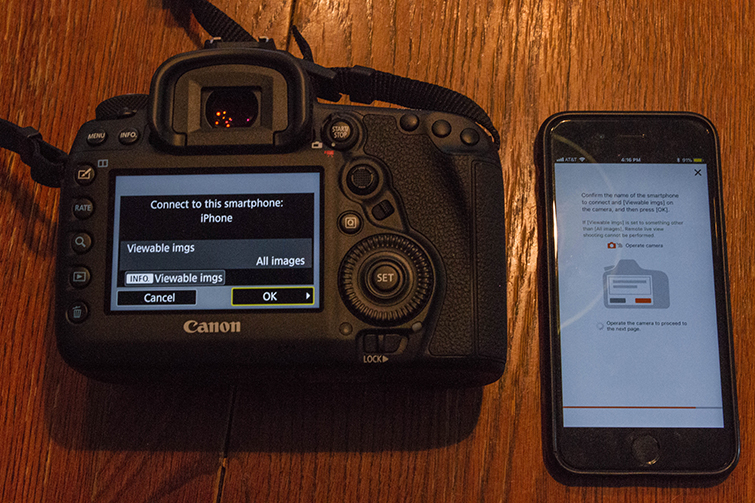
Once you have the Canon App, you’ll go back to your 5D and choose the “Wi-Fi Function” option under the “Built-in wireless settings.” You’ll choose the icon for your smartphone (or other device of choice). Choose “Easy connection” over “Select a network,” and you’ll find yourself at a screen with info about your Camera’s SSID and an “Encryption key” to sync your camera to your smartphone.
You’ll then go to your smartphone and navigate to your wireless settings and find your Wi-Fi connections. You should see a Wi-Fi signal with your Canon 5D SSID (set to your camera’s nickname). You’ll simply choose that Wi-Fi and put in your “Encryption code” as your Wi-Fi password. Give your camera and smartphone a few seconds to connect. After you go back to your camera, you’ll be asked to confirm your connection, and from there you’ll be connected and synced!
Open in Canon App
If you go into your Canon App now, you will see a page confirming your two devices are connected and synced. If not, you can manually connect them in the app in the same way. The Canon Camera Connect app has lots of functionalities of its own, a few you’ll notice right away are your ability to view and transfer your images and video files directly on the app.
Remote Smartphone Controls
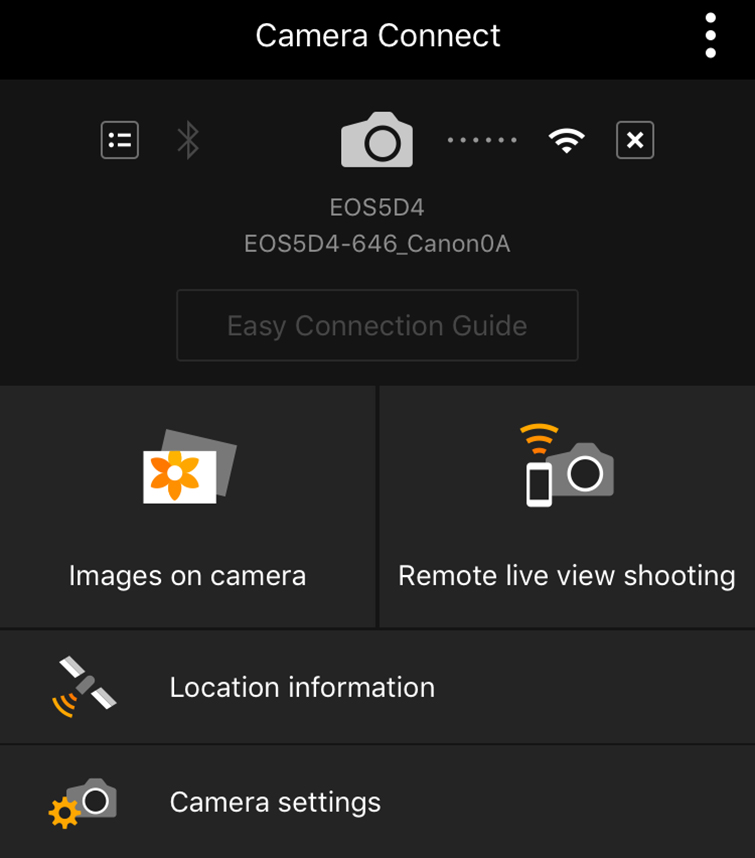
From within the app, you can sync and manage different aspects of your camera remotely. Some of the most notable controls allow you to change things like ISO, F-stop, shutter speed, and exposure. For video purposes, you can start and stop recording; change other more advanced controls like your white balance and frame rate (and change between MOV and MP4); and keep tabs on recording time and battery life — and even monitor audio levels.
For film and video professionals, this opens lots of doors when shooting solo and you need to set a camera and monitor remotely. It’s also helpful when vlogging or filming yourself, as you won’t need to jump back and forth between in front of and behind your camera. You can also use this to get your camera into tight or hard-to-reach spaces where you can’t monitor the viewfinder directly.
For more Canon 5D (and other camera) tips and tricks, check out these articles below.


