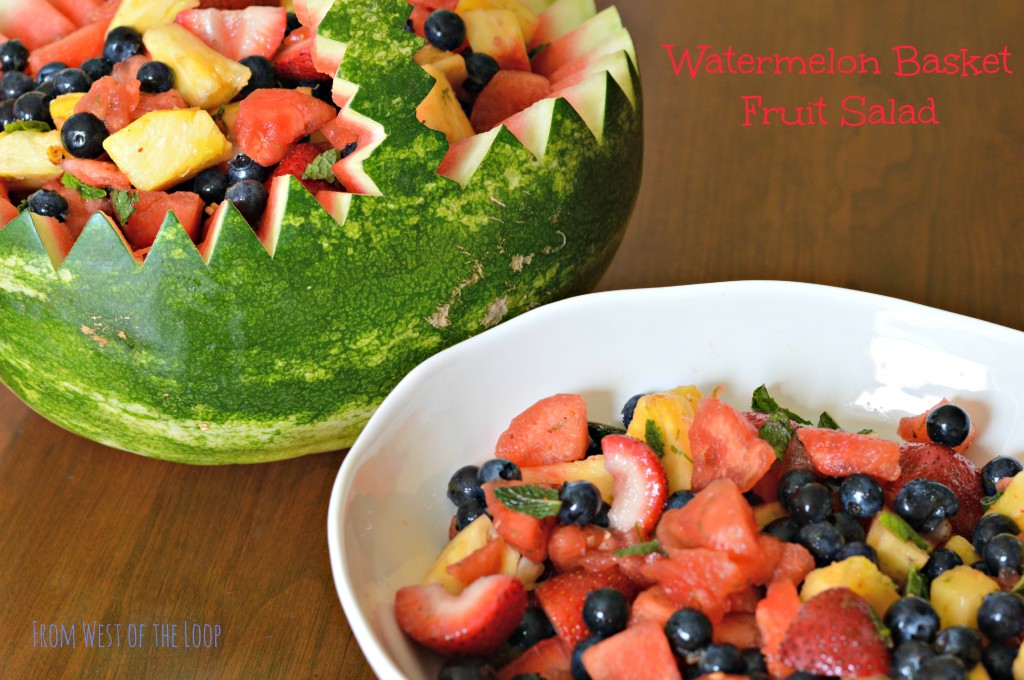
Turning whole watermelons into adorably shaped bowls for serving fruit salad is a Pinterest staple. Having once carved a round baby watermelon into a bloody brain for a second grade Halloween party, I felt like I needed to redeem myself by making one of these less macabre watermelon shapes. JR’s first grade class Author’s Tea was on the agenda for this week, so I volunteered to bring fruit salad. And took the opportunity to attempt my first watermelon basket.
Making a watermelon basket is surprisingly easy and does not require any special equipment beyond a large carving knife, an ice cream scoop and a small paring knife. But it never fails to impress. When Zuzu saw the basket that I had made for JR’s class, she immediately begged me to make one for the end-of-the-year party she is hosting for her friends. Sure, why not? And maybe I will tackle one of the baby buggy shaped watermelon baskets for the baby shower I am throwing in July.
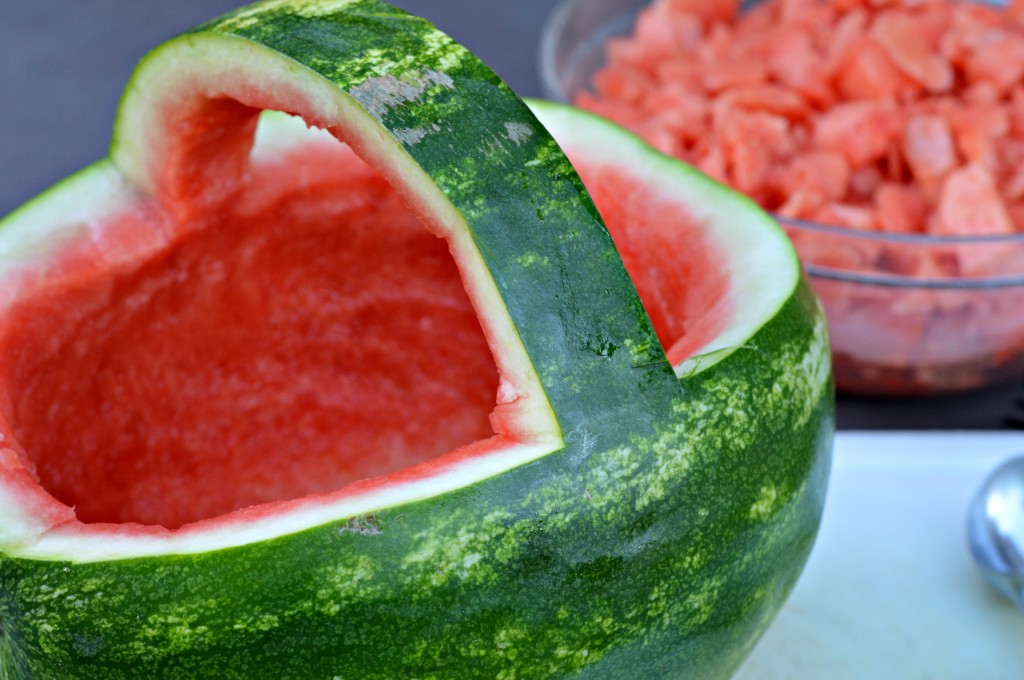
To make a watermelon basket, pick a large, oblong watermelon with a flattish bottom. Look for a yellow bottom, which is an indication of ripeness. With a non-toxic marker, draw a two parallel lines, about two or three inches apart, over the top of the watermelon, starting and ending at the middle of the watermelon. This is the handle. (If you think you may want to decorate the edges of the handle, start with a wider handle. If not, two inches in width is fine.) Next, draw a line around the long ends of the watermelon connecting the bottoms of the handles on either side. These lines will guide your cuts. In other words, you want to cut in from the ends of the watermelon, about halfway from the bottom, and then up to the top of the watermelon, leaving a two or three-inch bridge in the middle to form the handle.
Once you have cut the wedges out of each side of the watermelon, use an ice cream scoop to scoop out the flesh of the watermelon, reserving the fruit for the salad. (Don’t forget to cut up the flesh from the wedges you cut out initially.) Cut out the fruit from underneath the handle as well. Scoop all the way until you begin to see white at the bottom, but be careful not to make the bottom too thin. Make the inside of the basket as smooth as possible. Pour out any liquid that accumulates – you may need to pat dry with paper towels.
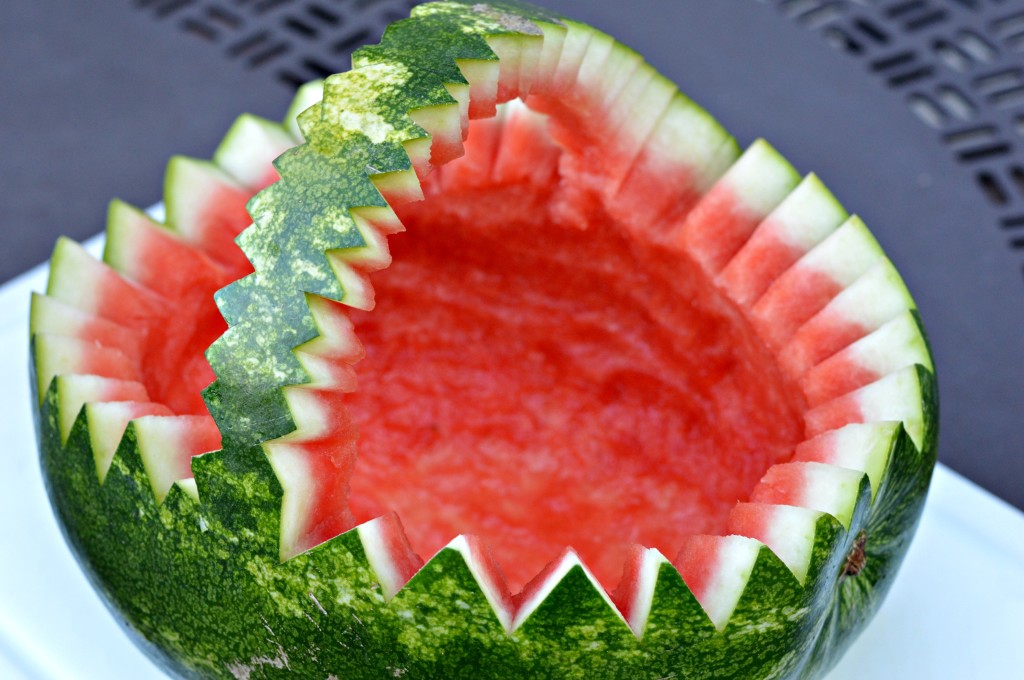
If you wish, you can decorate the edges of the basket and handle with scallops or triangles. You can draw the design with your marker or freehand it. As you can see from mine, the edges don’t have to be perfectly symmetrical to look cool. (Although I will confess that the uneven edges of mine made me slightly crazy. And I think that I made my handle too thin.)
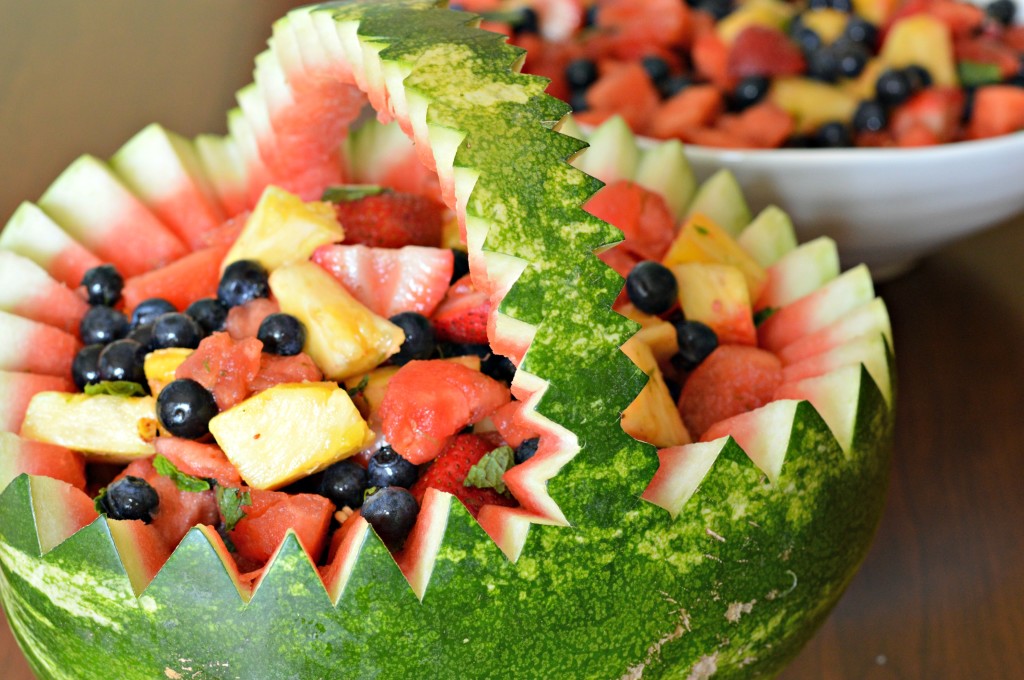
Make your fruit salad in a bowl, not directly in the watermelon basket because it is very hard to toss the pieces of fruit in the watermelon basket. For JR’s class Author’s Tea, I made a kid-friendly fruit salad with watermelon, pineapple — which is in season now, did you know that? — and berries. For color and interest, I added some lime zest and fresh mint leaves. Once your fruit salad is ready, carefully spoon as much of it as you can it into the watermelon basket. You can put any remaining fruit salad into a pretty bowl and serve it alongside the watermelon basket if you are feeding a large crowd.
You can absolutely make the watermelon basket at least a day ahead of time. Just wrap in plastic and refrigerate. Prior to filling, pour out any liquid that has accumulated in the bottom.
- 1 watermelon
- 1 pineapple
- 2 pints blueberries
- 2 quarts strawberries
- Zest of two limes
- ¼ cup gently torn mint leaves
- Wash and dry the berries. Slice the strawberries into halves or quarters depending on size.
- Cut the flesh from the watermelon into bite-size chunks.
- To prepare the pineapple, cut off the top and bottom. Cut the pineapple into four quarters and then halve each quarter. Cut off the point of each wedge of pineapple to remove the woody core. Cut off the outer rind of each wedge. Cut the remaining spears of pineapple into bite-sized chunks.
- Gently combine the fruits in a large bowl. Add the lime zest and mint leaves and toss.
- Refrigerate until ready to serve.